Opencell allows to manually create an invoice, without using a billing run, or even without having preexisting rated elements.
Concept
The manual invoice allows to enter an invoice completely manually, without the need to configure Rating events. It works completely independently from the rating engine.
Manual invoice’s amounts are computed based on the invoice lines provided.
The result will be a valid invoice entity no so different from the “regular” invoice, with the ability to generate XML and PDF invoices.
The only difference is that no rating entity will be linked to the invoice/invoice lines (no Rated transaction, subscription, offer, services, …).
How-to
All that is presented here is of course also available through API.
Please refer to technical documentation for more information.
Where
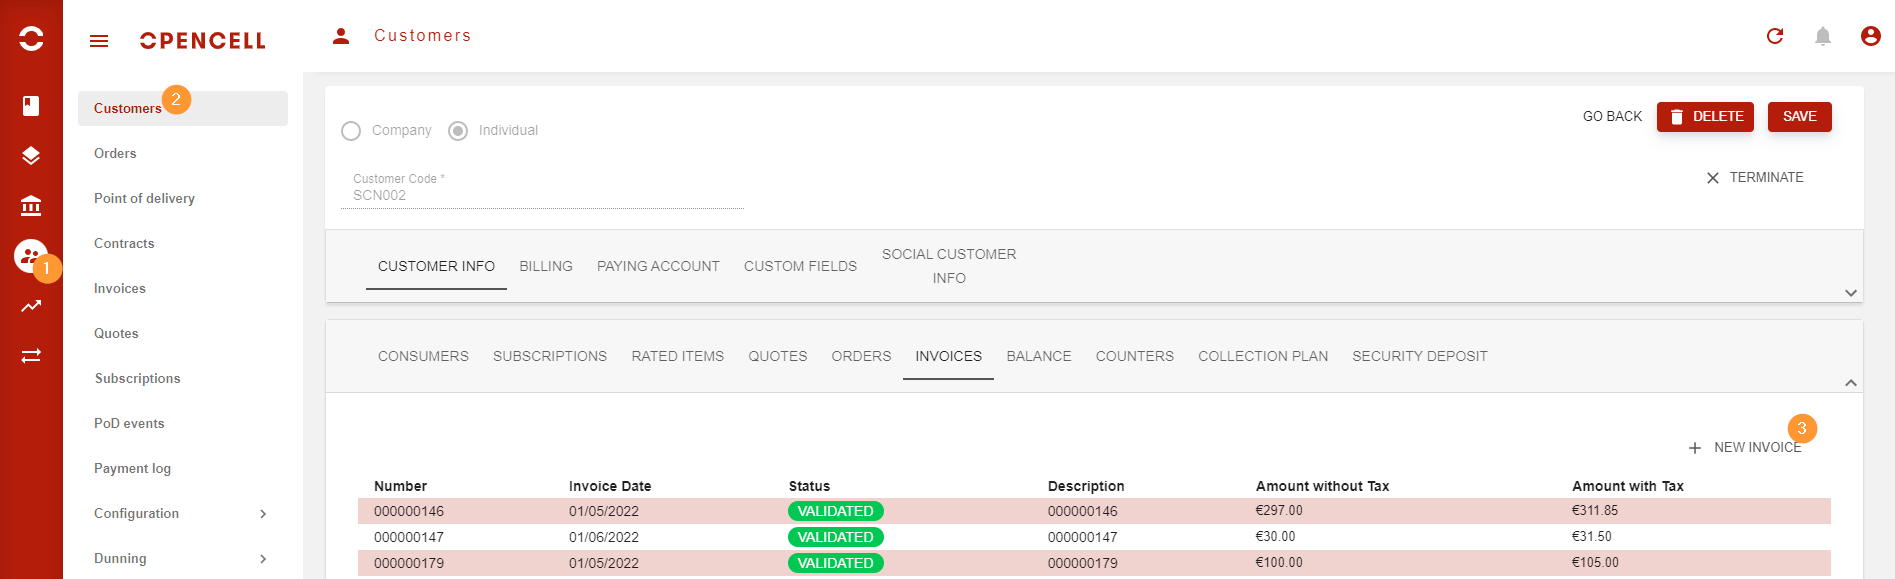
Manual invoice creation is available from Customer Care module, on both:
-
Customer 360° view (“Invoices” tab)
-
Global invoices list

Creating an invoice
-
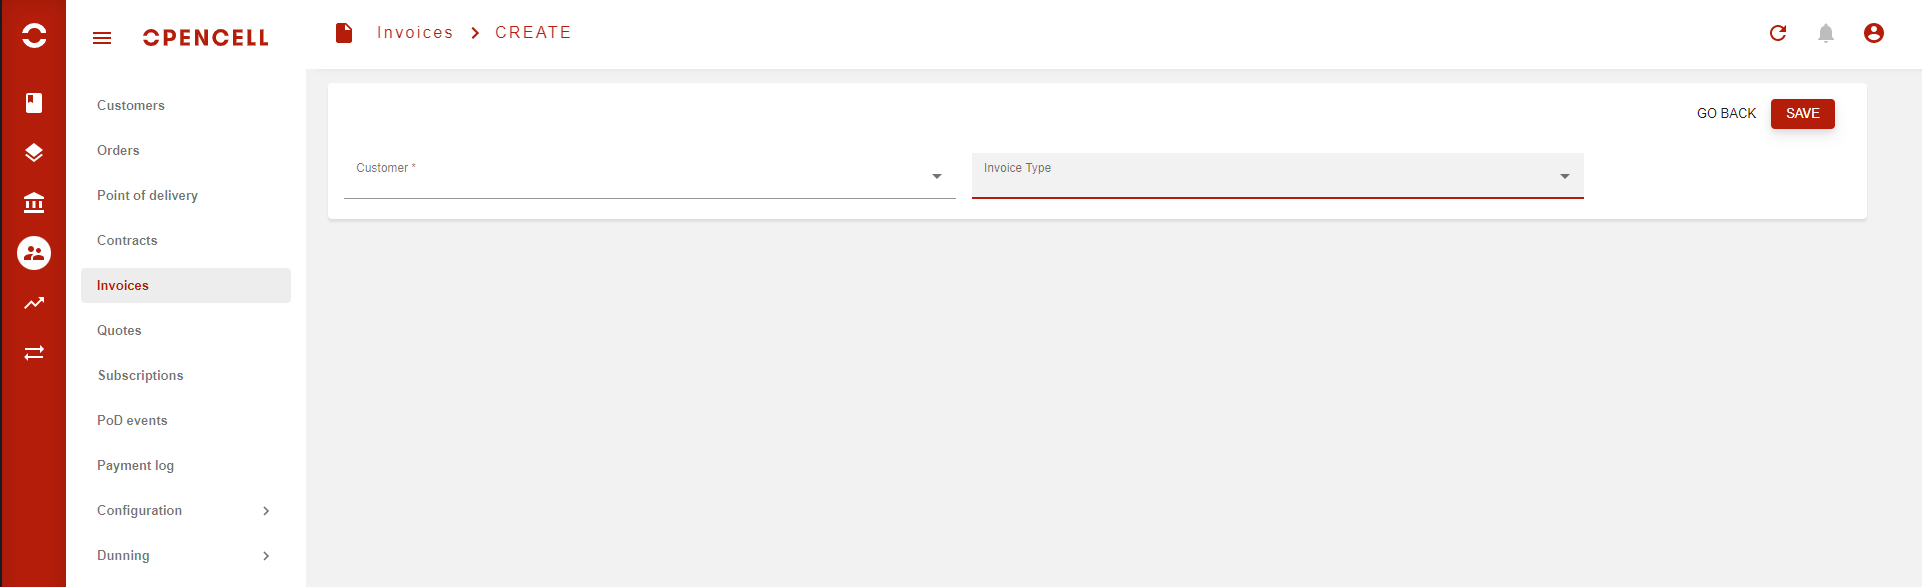
When creating manual invoice from the global invoices list, you have an additional step to choose target Customer (BillingAccount) and invoice type
Invoice type allows you to create adjustments, credit notes, quotes, or an invoice from any custom type you have defined.
-
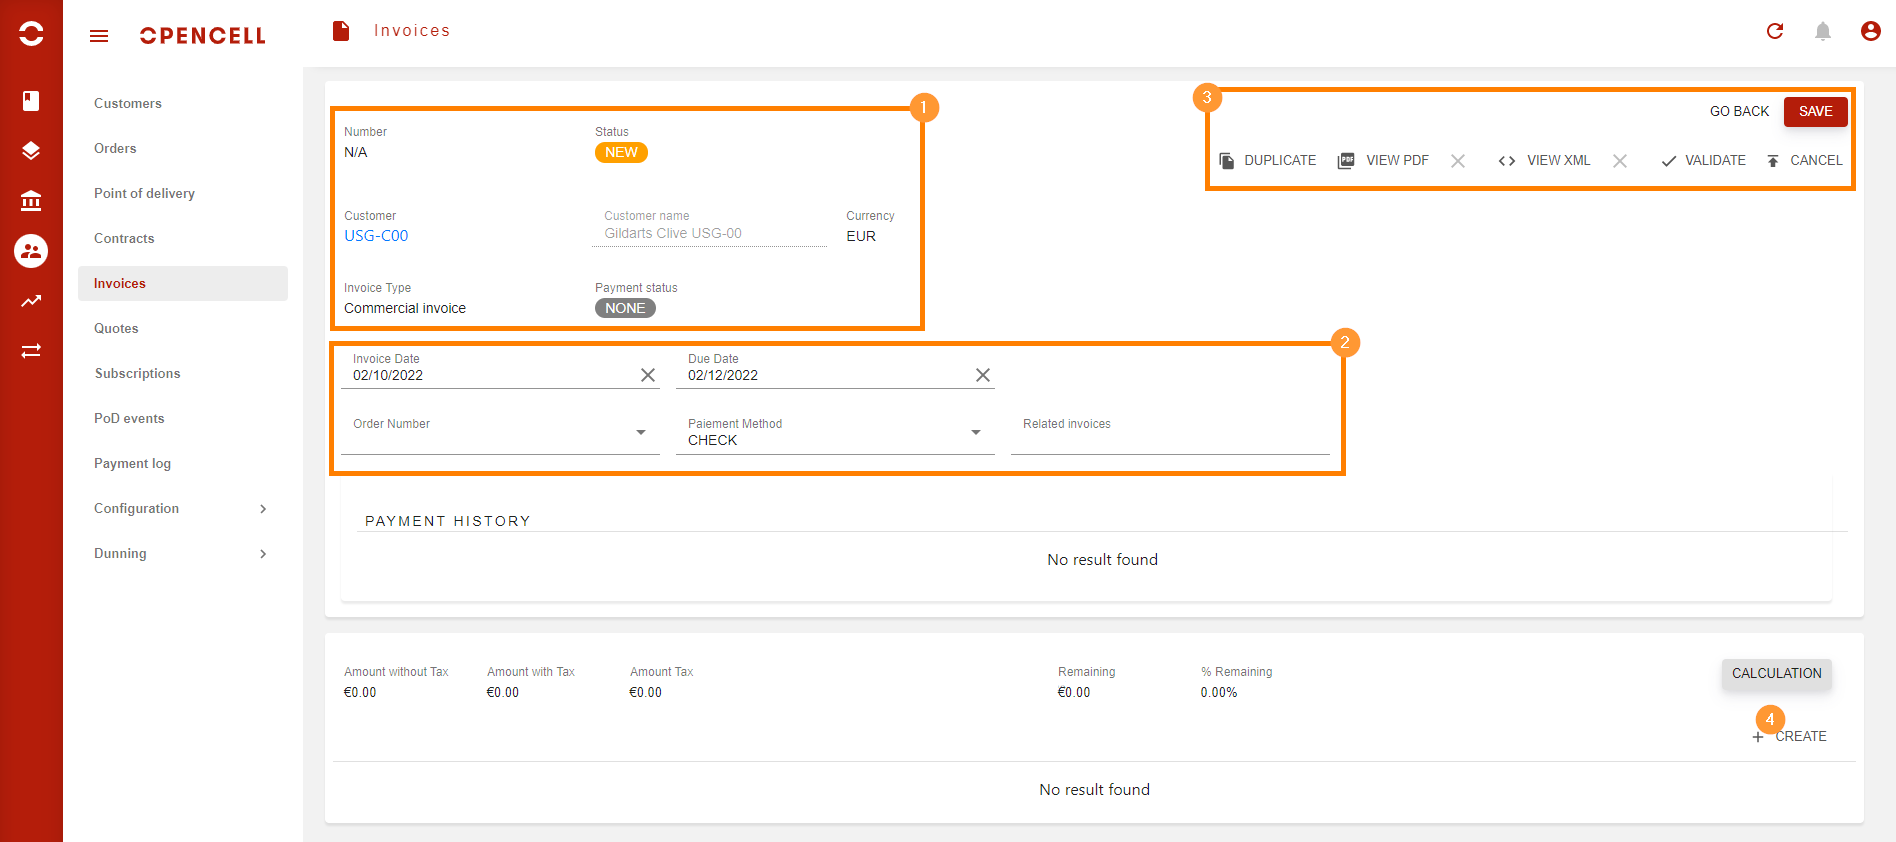
After this additional step, or if you choose to create the invoice directly from the Customer details page (in which case the invoice type will always be the default “COM - Commercial invoice” type), you’ll get a new invoice.
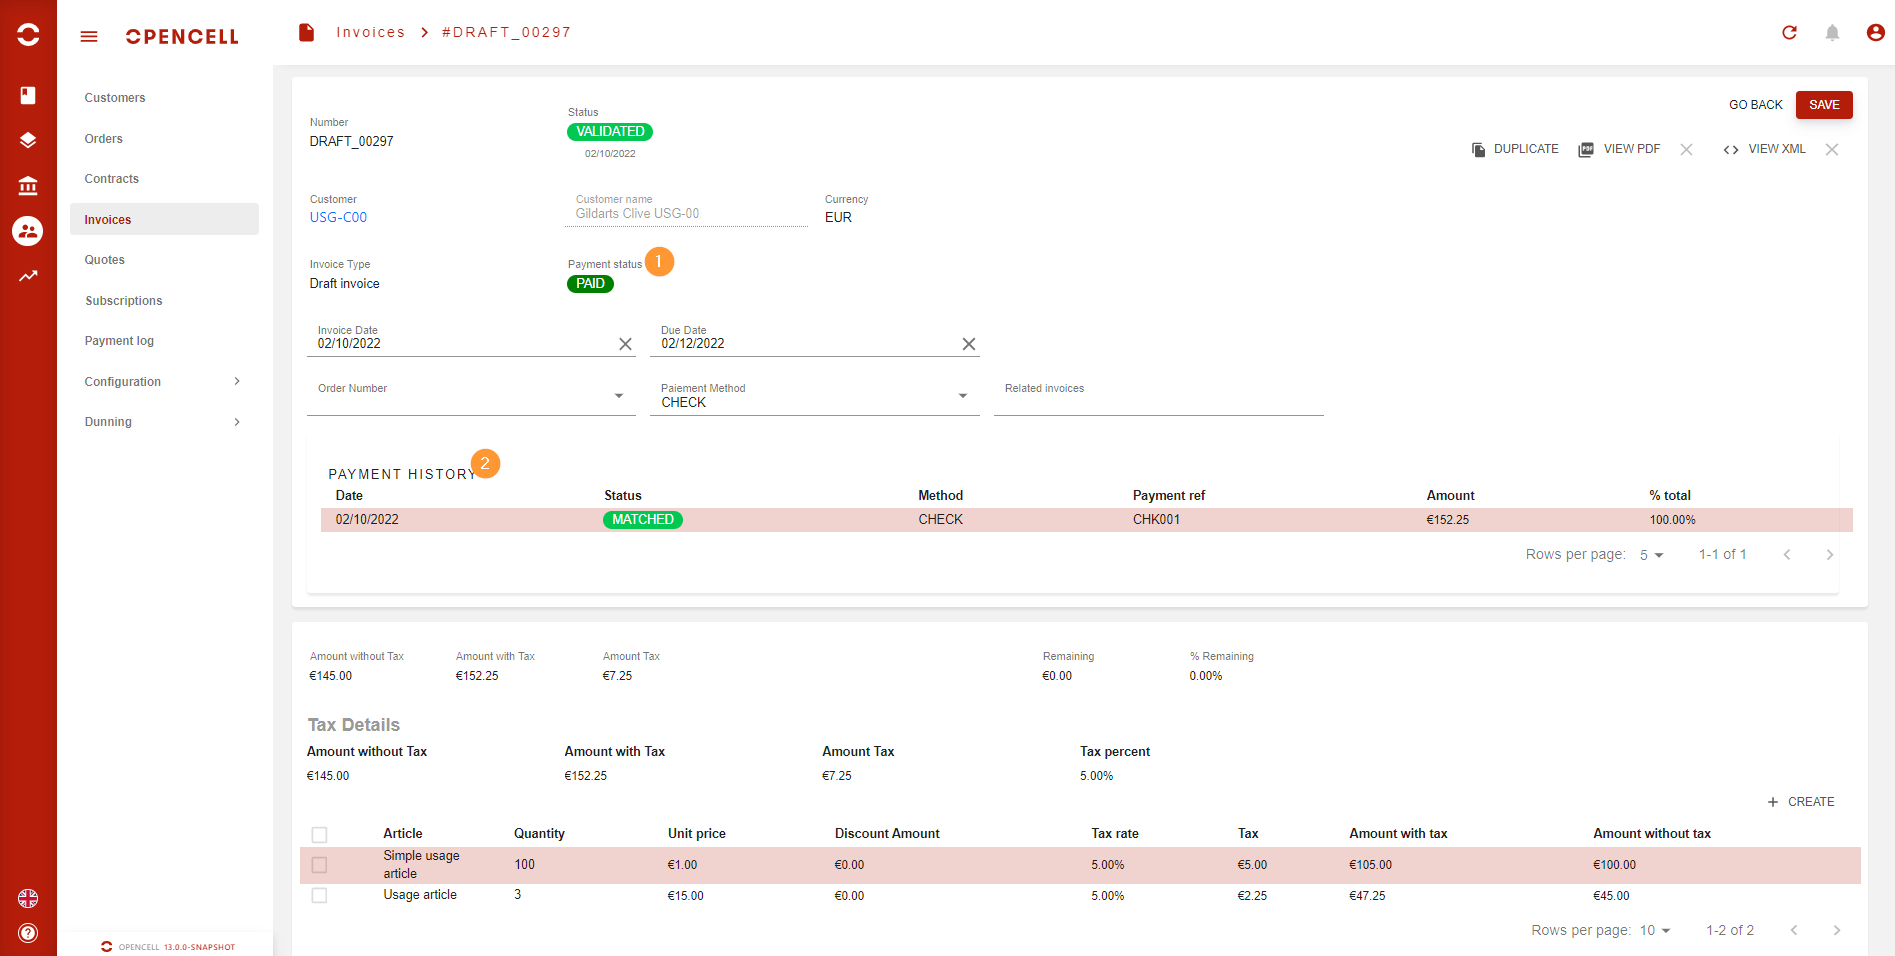
There you can:-
(1) Check the invoice statuses, customer, and type
-
(2) Update invoice date, due date, payment methods and related invoices (that last one is especially useful for adjustments and credit notes)
-
(3) Perform a number of action (availability will very depending on invoice status):
-
Duplicate invoice: creates another invoice based on this invoice
-
View PDF: generates and/or downloads PDF representation of the invoice
-
View XML: generates and/or downloads XML representation of the invoice
-
Validate invoice: Validates the invoice. You won’t be able to edit it afterwards, and an invoice number assigned.
-
Cancel invoice: Cancels the invoices. You won’t be able to update it afterwards. Invoice will never be sent to customer/accounting/payment.
-
-
(4) Create invoice line: Click here to add a new invoice line. Invoice will be recomputed automatically.
→ If you need it, you’ll know 🙂
-
Adding invoice lines
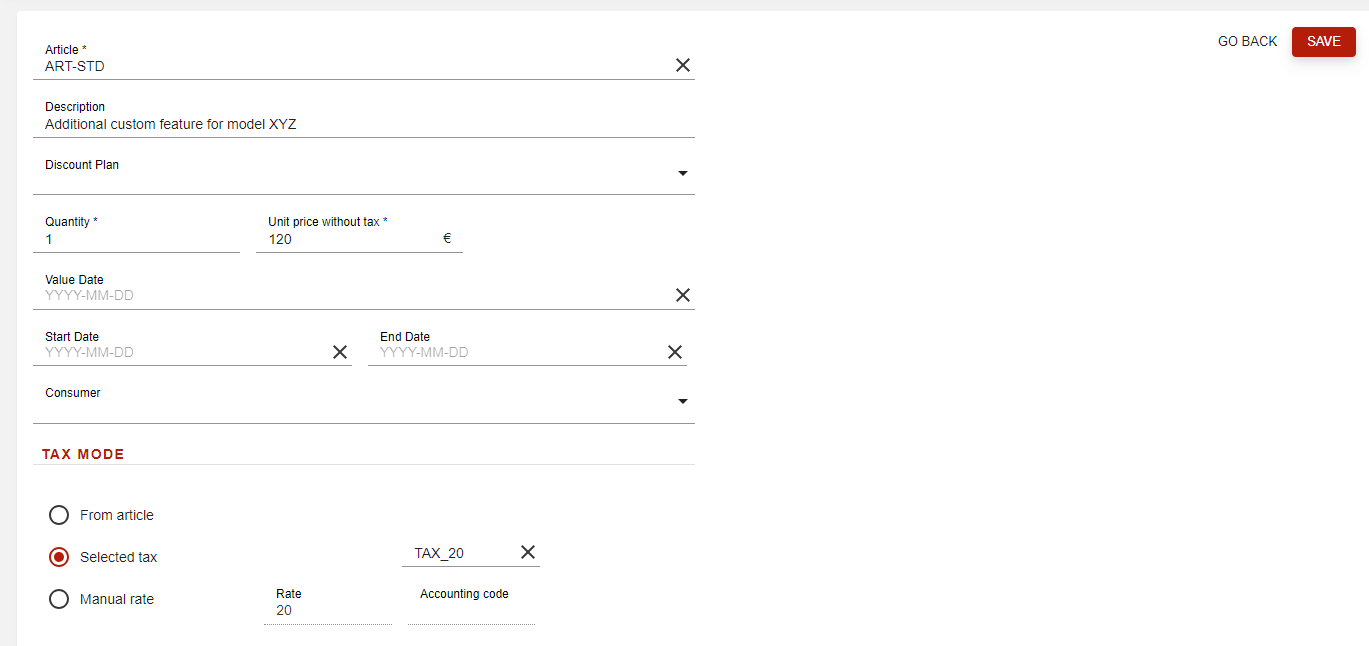
Hitting the “Create invoice line” button will bring the following dialog, where you will enter the invoice line details:
-
Article: the article you want to invoice.
The article defines the tax, invoice subcategory, and accounting code for the invoice line. -
Description: label of the invoice line that will be displayed on the invoice.
-
Discount plan: you can choose a discount plan to apply to this line.
-
Quantity: item quantity used to compute price.
-
Amount with/without tax: unit price to be used.
-
Start/End dates: optional period that the invoice line covers (may be useful for precise revenue recognition)
-
Consumer: you can optionally indicate to which consumer (user account) the invoice line is assigned to
-
Tax mode: instead of using the tax computed from the article, you can select a specific existing tax or a manual tax)
Validated invoice
Once you’re satisfied with your invoice, you will have to validate it.
It won’t be editable anymore and an invoice number will be provided.
Note that payment information (2) will become available when the invoice has been paid (1).
… / …