Historically in Opencell, you were able to create reference tables in the Admin and view them there. Since we created the Portal for all users, we are migrating features from our legacy admin to our current Portal.
One of the selected features is the reference tables.
Reference tables are custom tables that you can create, and now see. They allow you to extend the existing model as you wish and you can create as many as you want. Let’s have a quick tour.
Reference tables in Portal
You will be able to see all your reference tables in the Catalog app → Catalog manager → Reference tables → Custom tables
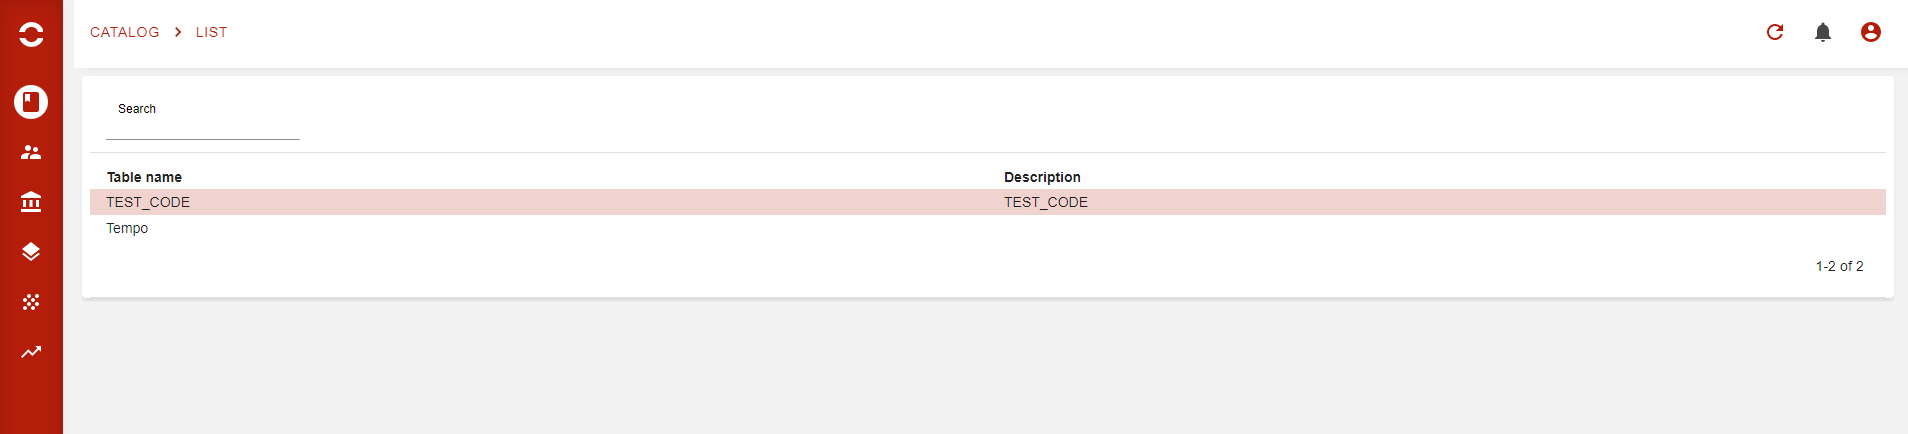
All custom tables created on your environment will be visible directly here. This feature being a little specific, there is still room for improvement that will come in time.
Then, from this view you will be able to access each table by simply clicking on it:
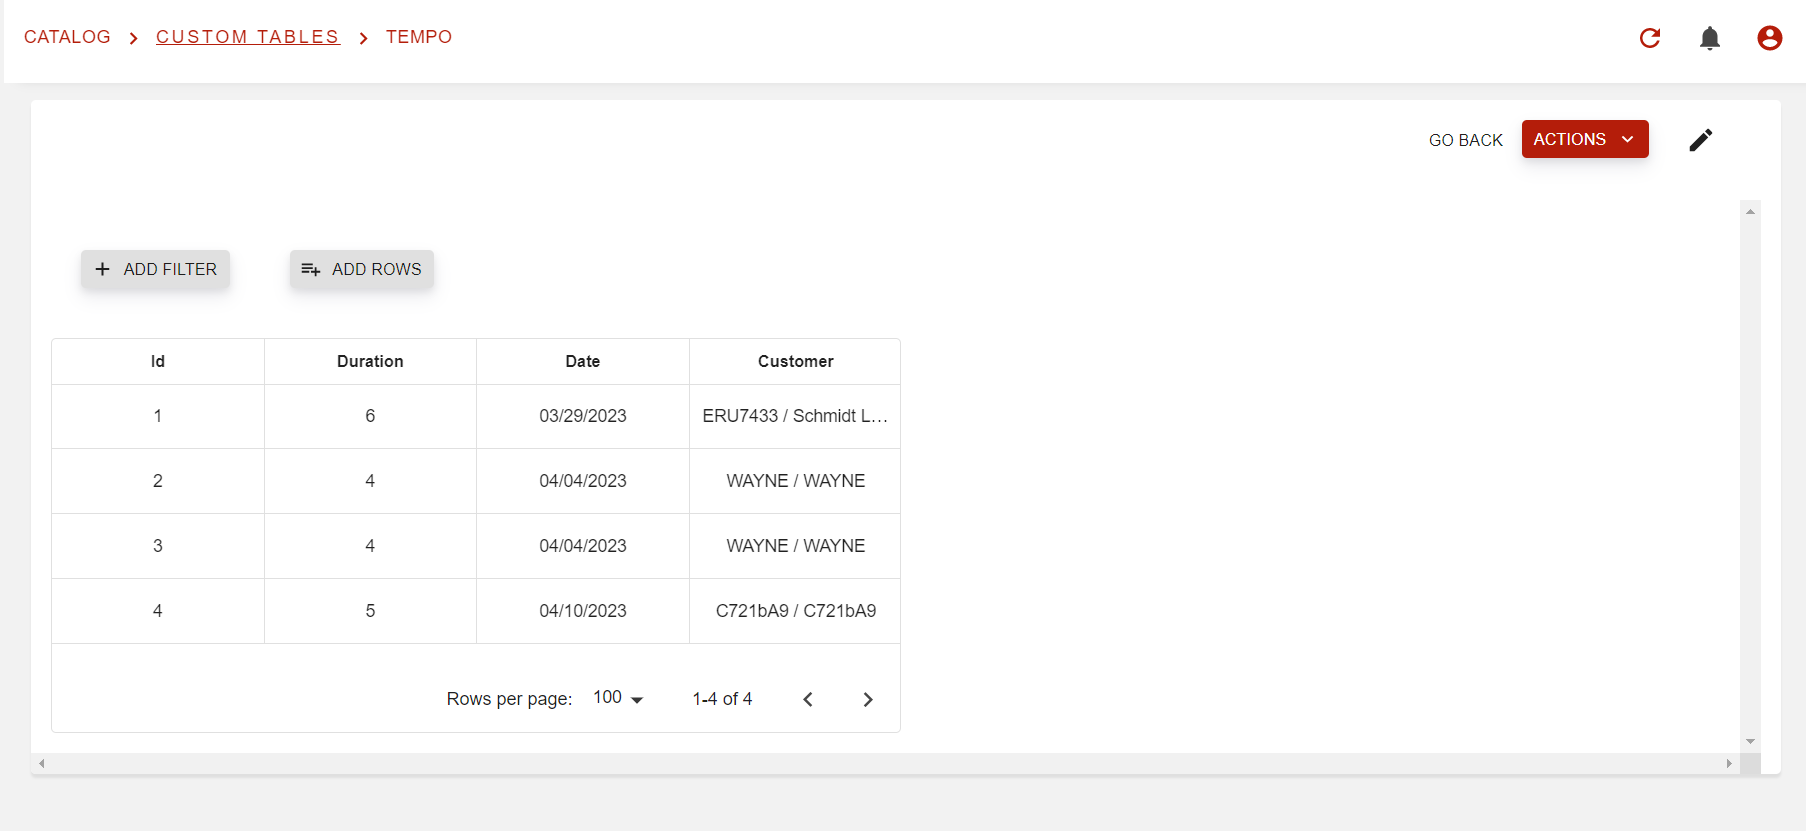
More than just viewing the table, the portal now allows you to add new lines to it via the ‘ADD ROWS’ button at the to left corner of the table. Downloads of the table are possible via the ‘ACTION’button and formats are .XLSX and .CSV.
Filters for each column on each table are also available.
Filters at the top of each columns depend on the field type of each column, so do not be surprised if you do not have the same options from one column to another
Once you clicked on ‘ADD FILTERS button’, you will then see the page as follows
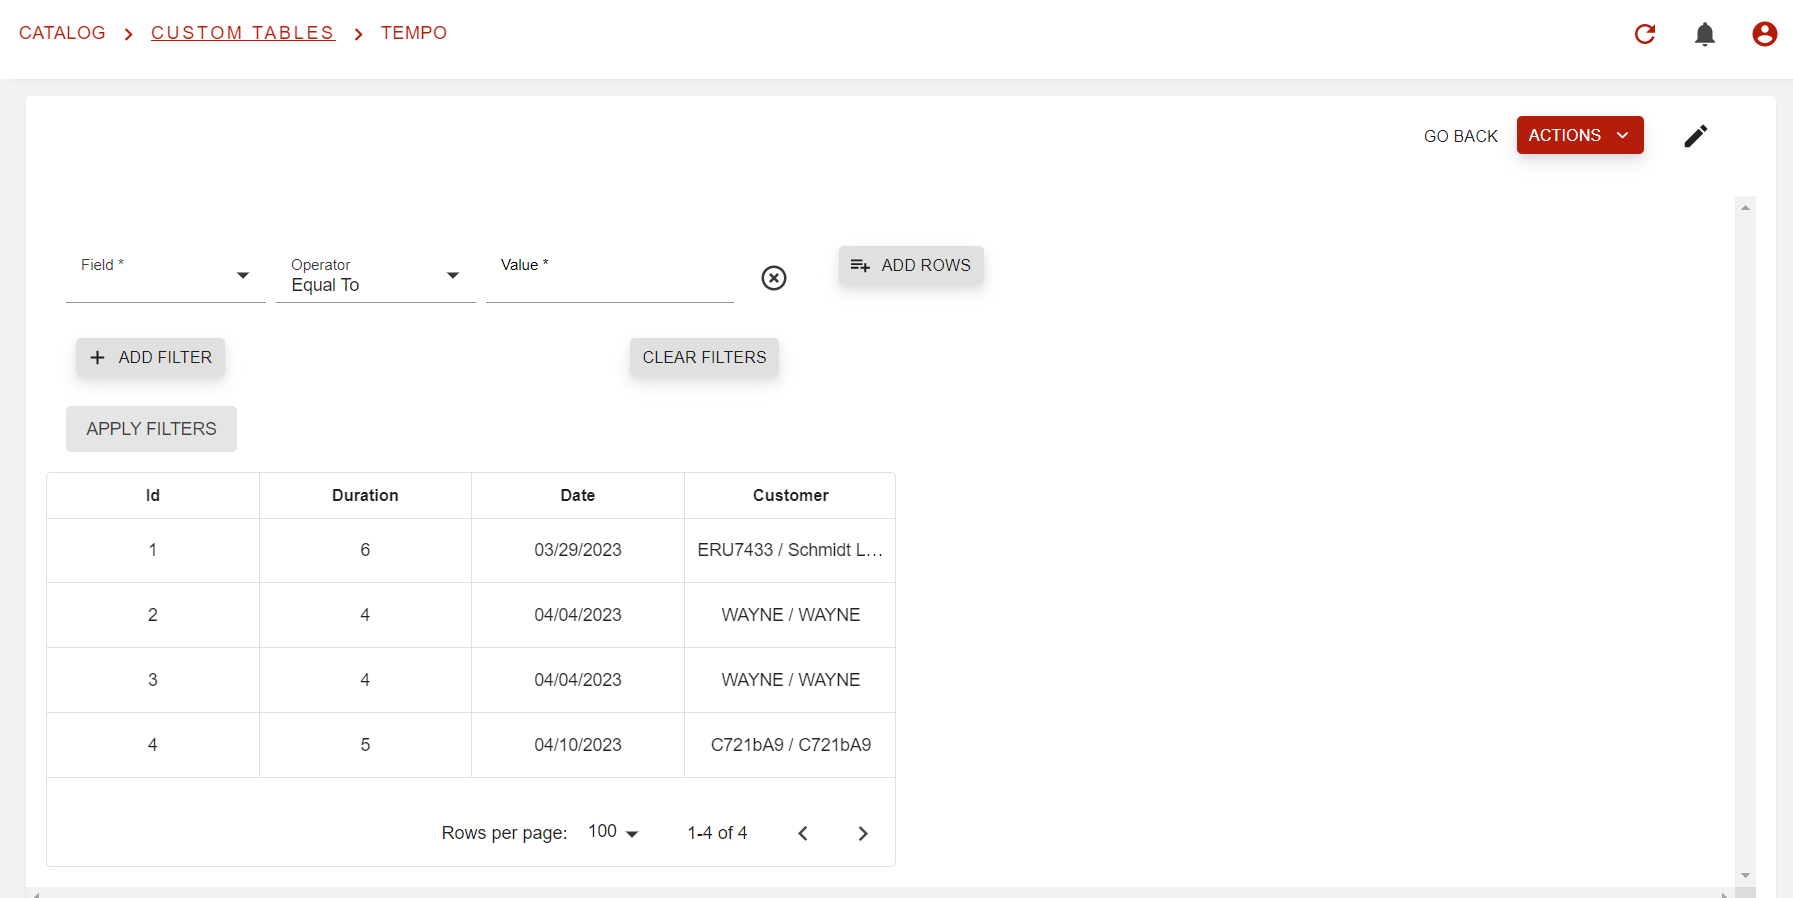
From there, select the field you want to apply the filter on, select the operator and value, then don’t forget to apply filter and there you go!
Though this documentation is made for the portal, here’s a small how-to for creating custom tables in the Admin.
Once on the Admin, go on the Administration tab, and select Entity customization.
Then, hit the “NEW” button.
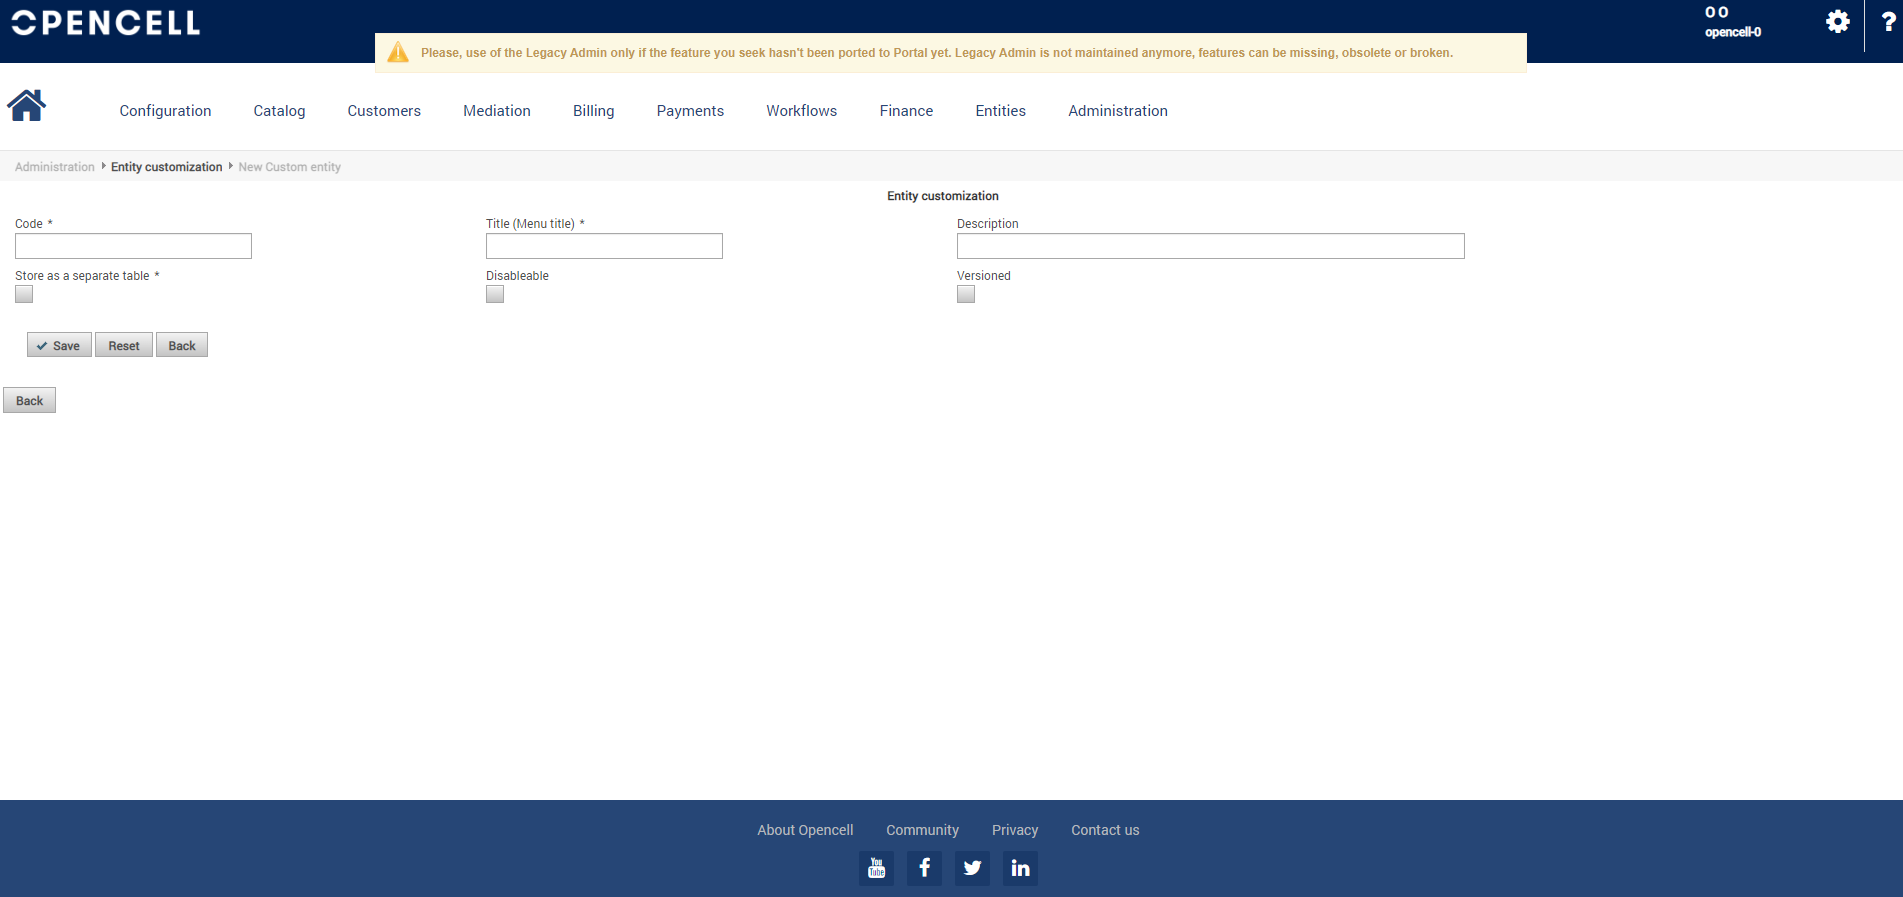
Enter al mandatory fields and do not forget to check the “Store as a separate table”.
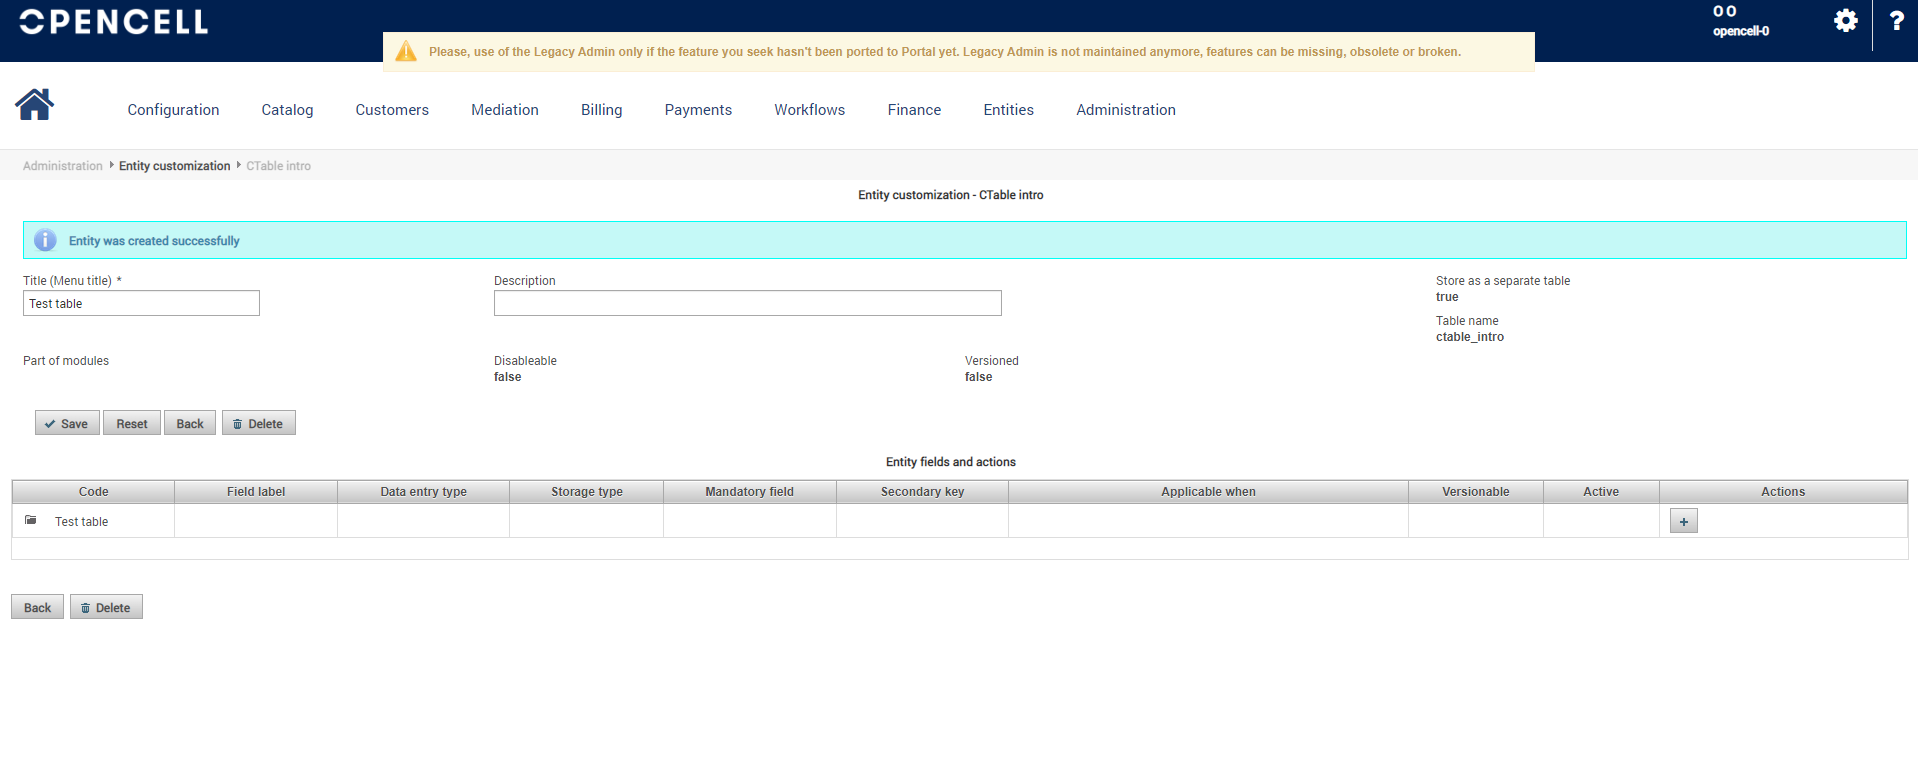
Then you can start adding new columns to your table by using the “ + “ button at the far right side of the list.
And you’re all set.