Adjustments can come on handy in various cases. Here we will see how to create an adjustment directly from an invoice.
We propose 3 different kind:
-
Adjustment on invoice: will be automatically matched to the original invoice
-
Manual adjustment: matching will be left to the user
-
Refundable adjustment: will generate an auto-refund
As of writing, automations for “refundable adjustment” has not been implemented.
Until then, the refundable adjustment type will behave as the manual adjustment.
Adjustment creation
Adjustment can only be created on a validated invoice; the option will not be available if your invoice is in another status.
Global adjustment vs Partial adjustment
Global adjustments will produce an adjustment for all the lines on the invoice, while partial adjustments will create an adjustment for only the lines that you have selected.
To create a global adjustments, use the “GLOBAL ADJUSTMENT” option from the ACTIONS menu.
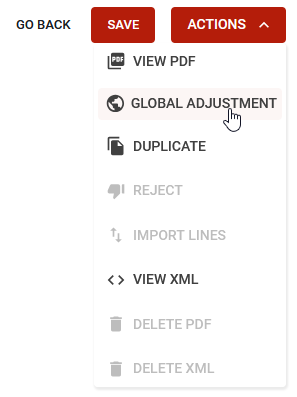
To create a partial adjustment, select the invoice lines you want to include, and hit the “PARTIAL ADJUSTMENT” button.

Adjustment configuration popup
The popup is the same for global and partial adjustment, expect for some minor text differences
When you request an adjustment, a popup will allow the following options:
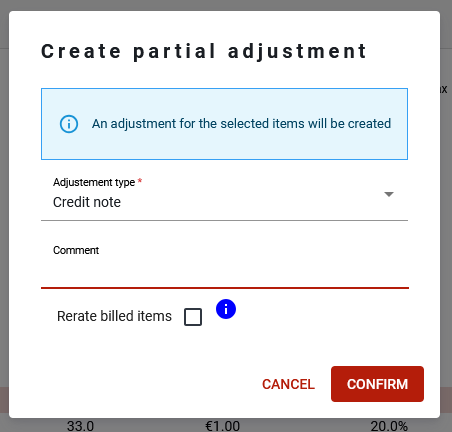
-
Adjustment type: select one of the adjustment types configured on your system.
There are 3 standard adjustment type:-
Credit note: the default manual adjustment (no automatic matching with an invoice)
-
Credit note on invoice: credit note will be automatically used on next invoices
-
Refundable credit note: credit note will be scheduled for refund
-
-
Comment: to prefill the comment on the credit note
-
Rerate billed items: Use this option to reinvoice the same items, but with updated price.
This will create processing batch to mark invoice’s rated items to rerate.
This batch will be visible on the Wallet operations page, and will be processed on the next run of the marking job.Rerating will then occur when rerating job is run.
Check and validate adjustment
After you have validated your choice on the popup, a new invoice of the selected type (an adjustment) will be created in DRAFT status and you will be taken to it directly

Essentially, Opencell will create an invoice of type Adjustment. The invoice lines present in the original invoice will be directly copied, this allowing you to easily create on in full. Obviously you can modify the lines, and all other fields as your invoice is still in DRAFT.
Notice that the original invoice is linked to the new one?
On invoices with type is Adjustment, you will be able to import invoice lines from other invoices. This comes in handy when you wish to create an adjustment for several invoice lines. To do so, you just need to link the invoices together, which can be done via the 'Related invoices' field. When at least one invoice is listed there,, then the Import lines option will be available to you
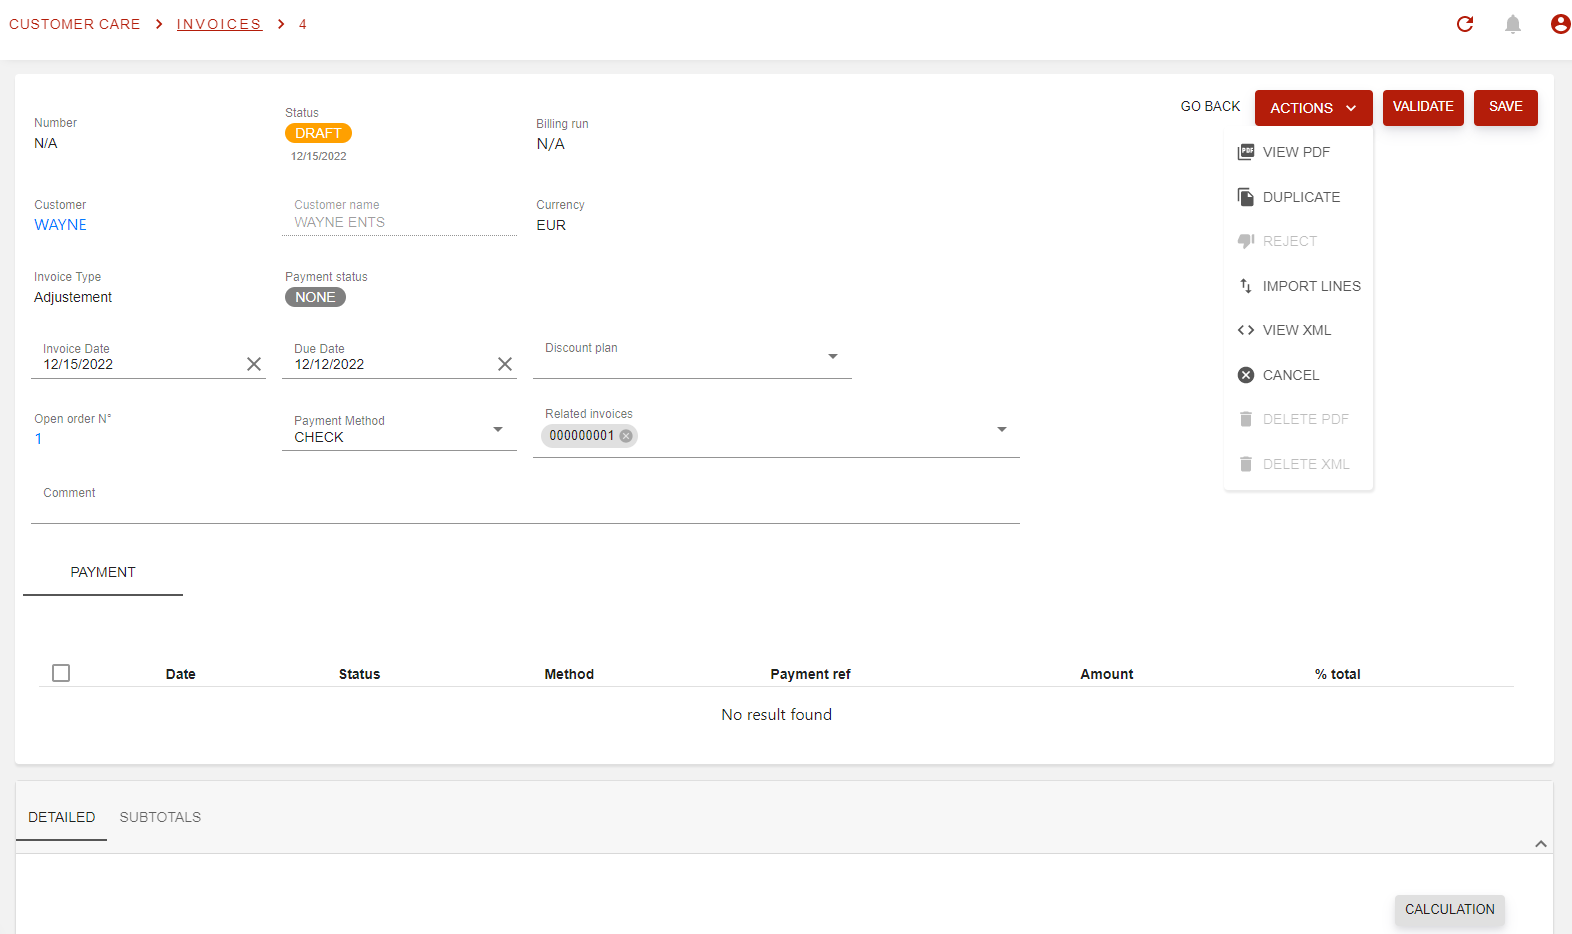
Next step will then be to select the invoice from which you wish to import the lines, and then select targeted lines directly.
Please note that when doing adjustment, we do verification that the sum of adjustments on an Invoice is always inferior or equal to the Invoice amount)
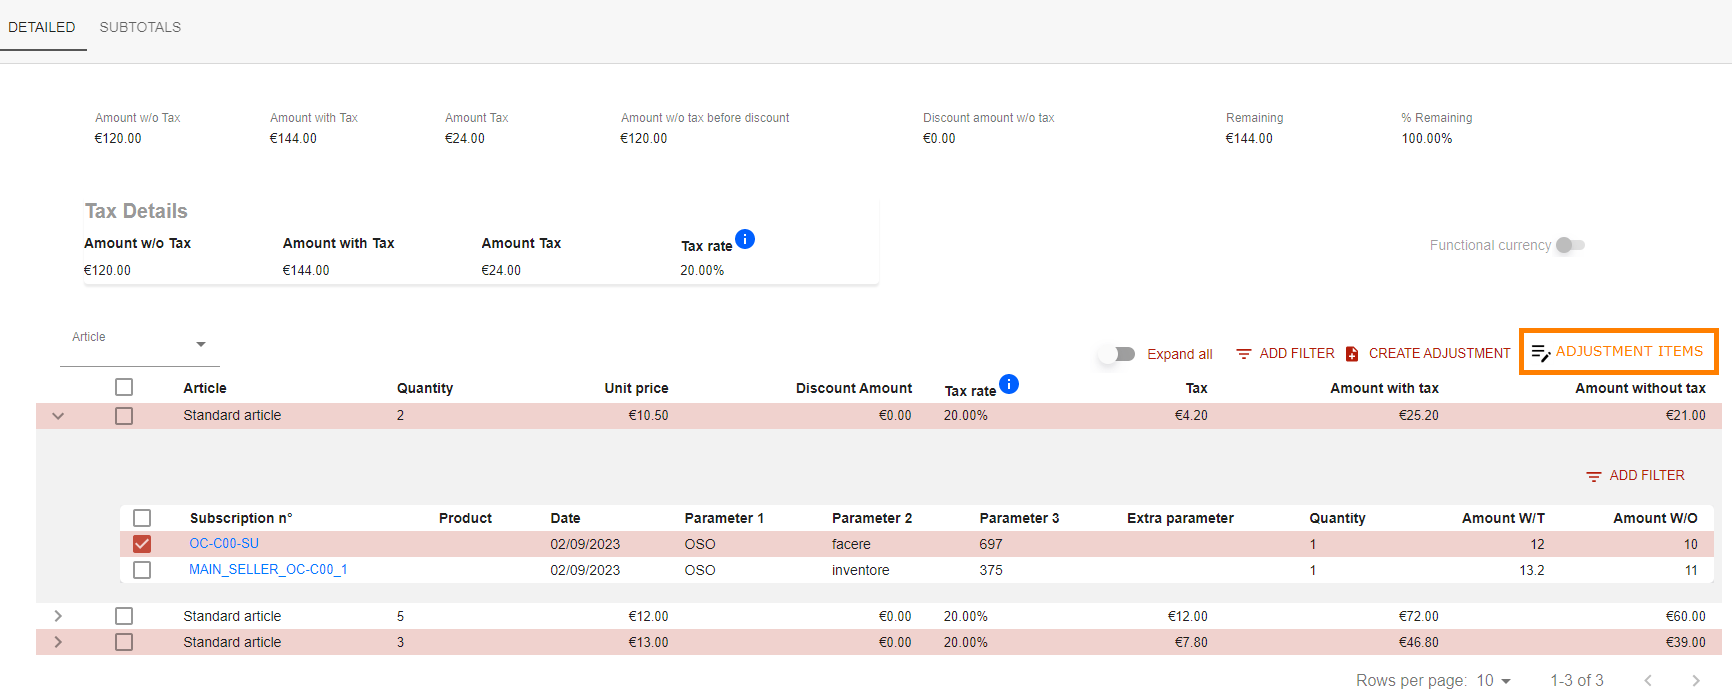
Adjustment item
Instead of generating a credit note, we can generate an “adjustment rated items” to be included on next invoice.
To do so, we select in the invoice details the lines to be adjusted as below:
After confirmation, they can be seen in the Operations/Rated items through a filter with “open” status:
They can also be edited in the Operations/Rated items, as any open rated items.
Mass adjustment items creation
Mass operations can be performed on Operations/Rated items global screen.
Manual adjustment
For manual adjustment, once validated, you will have to manually match both invoices together via the Manual matching, as below:
