
From 18.1.0 onwards, you can create an invoice manually in the new portal. You first create the invoice itself: the billing account, the invoice type, the seller and, if you wish, a comment. You then add its invoice lines on the invoice page.
Opening the creation page
In Customer Care > Invoices, click Create invoice at the top right of the invoice list. The Create new invoice page opens.
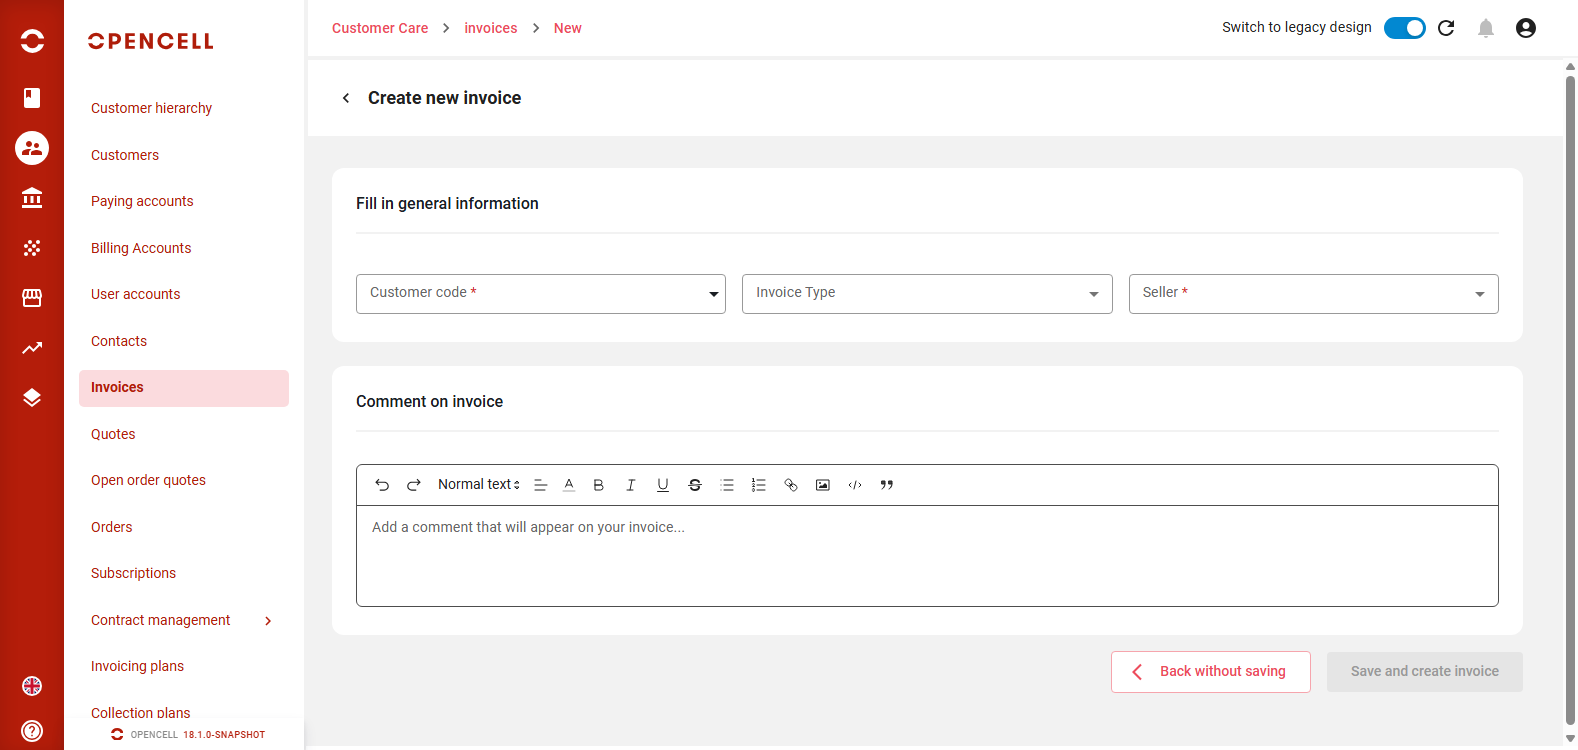
Filling in the invoice information
Fill in general information
Fields marked with an asterisk (*) are mandatory.
|
Field |
Mandatory |
What to enter |
|---|---|---|
|
Customer code |
Yes |
Select the billing account you are invoicing. |
|
Invoice Type |
No |
Select the type of invoice. |
|
Seller |
Yes |
Select the seller issuing the invoice. |
Comment on invoice
You can enter a comment that will appear on the invoice. The editor offers the usual text formatting options, such as bold, italic, lists and links.
Saving the invoice
-
Save and create invoice: creates the invoice. This button stays disabled until all mandatory fields are filled in.
-
Back without saving: leaves the page without creating the invoice.
Once the invoice is created, its invoice page opens. The invoice is in status new and has no invoice lines yet. You can now add them: see Invoice lines.
An invoice needs at least one invoice line before you can validate it.