On this page we are going to see the Balance tab from the Customer 360° view.
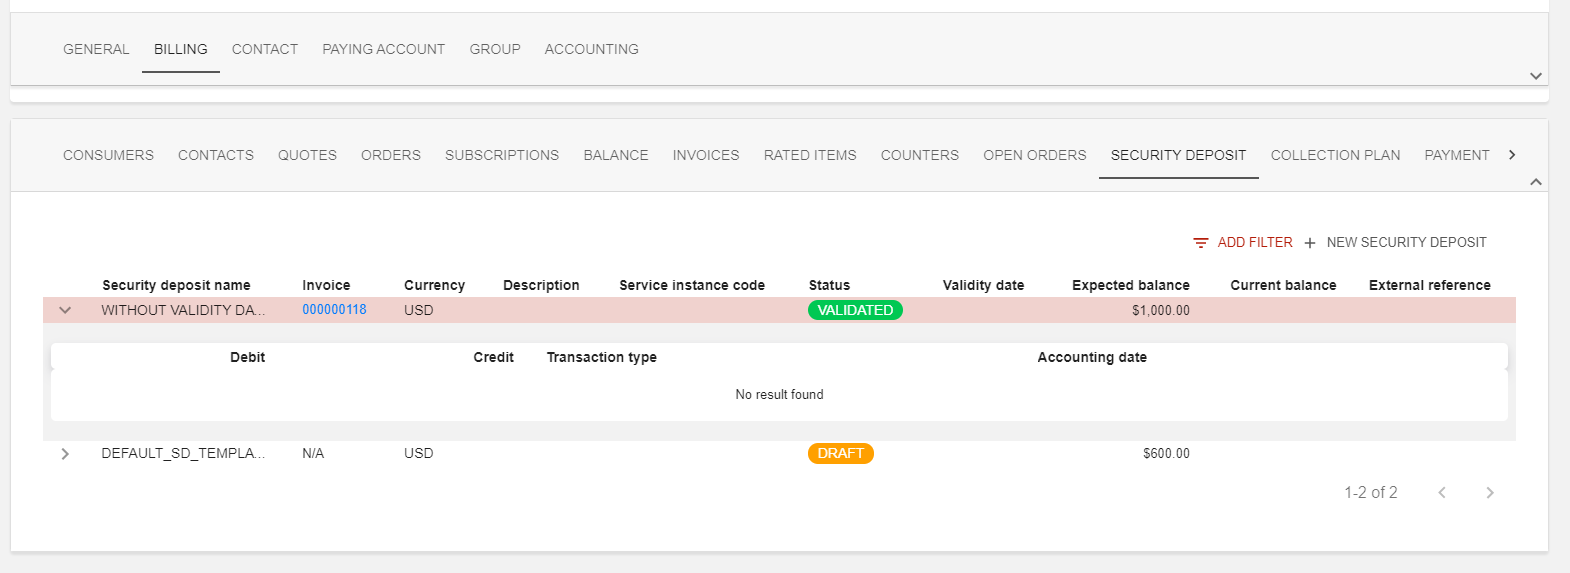
Security deposit tab
As for Open orders, Security deposits (SDs) is an activable/un-activable feature in Opencell environments.
In this tab view, you will find displayed all SDs linked to your customer, regardless of their statuses.
For now, no search bar is available, and the :filter: button allows a filter on the service instance code (if you link your SD to a product in a subscription 🙂 )
However, a nice feature on this view is the ability to expand each SD line to display all its movement history.
You can also, from here, create a new deposit manually for your customer, let’s see how!
Creating a Security Deposit manually
This page is currently the only one that allows you to create manually a deposit for your customer.
To do so, hit the NEW SECURITY DEPOSIT button on the top right corner of the list:
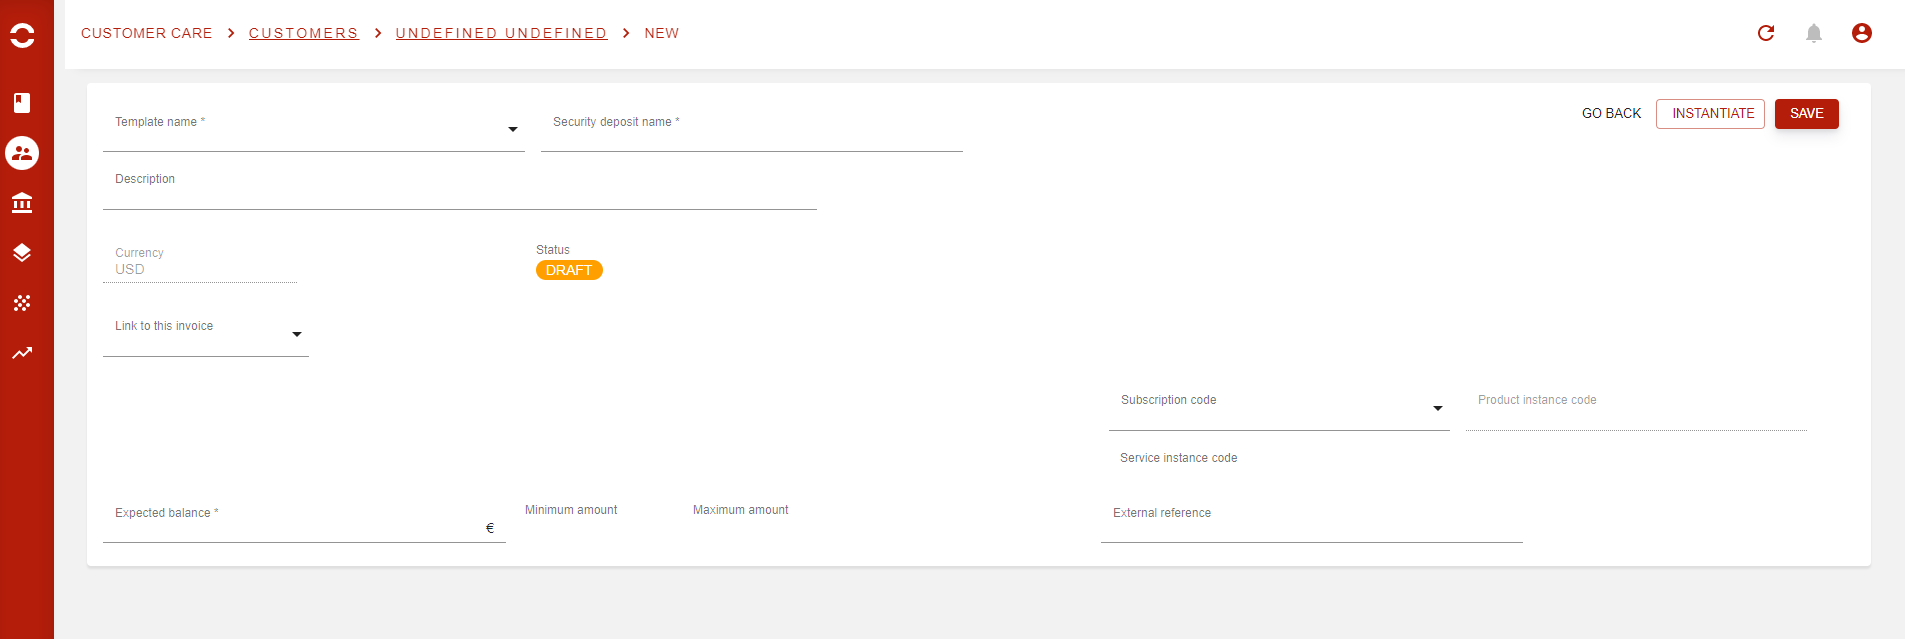
You will then arrive on the creation age where the deposit will already be in a DRAFT status.
When creating manually a deposit, you will have to select a template that will be used. As seen in the concept page, templates are managed in the Finance app, Multi Balances sub-menu, then Templates.
Opencell has defined a default template that you can use directly without any prior configuration (DEFAULT_SD_TEMPLATE).
The manual creation is the only way to link a subscription to a deposit for now.
When done you can either hot the SAVE or the INSTANTIATE button. If you chose the latest, then the Deposit will be updated to VALIDATED status, as below:
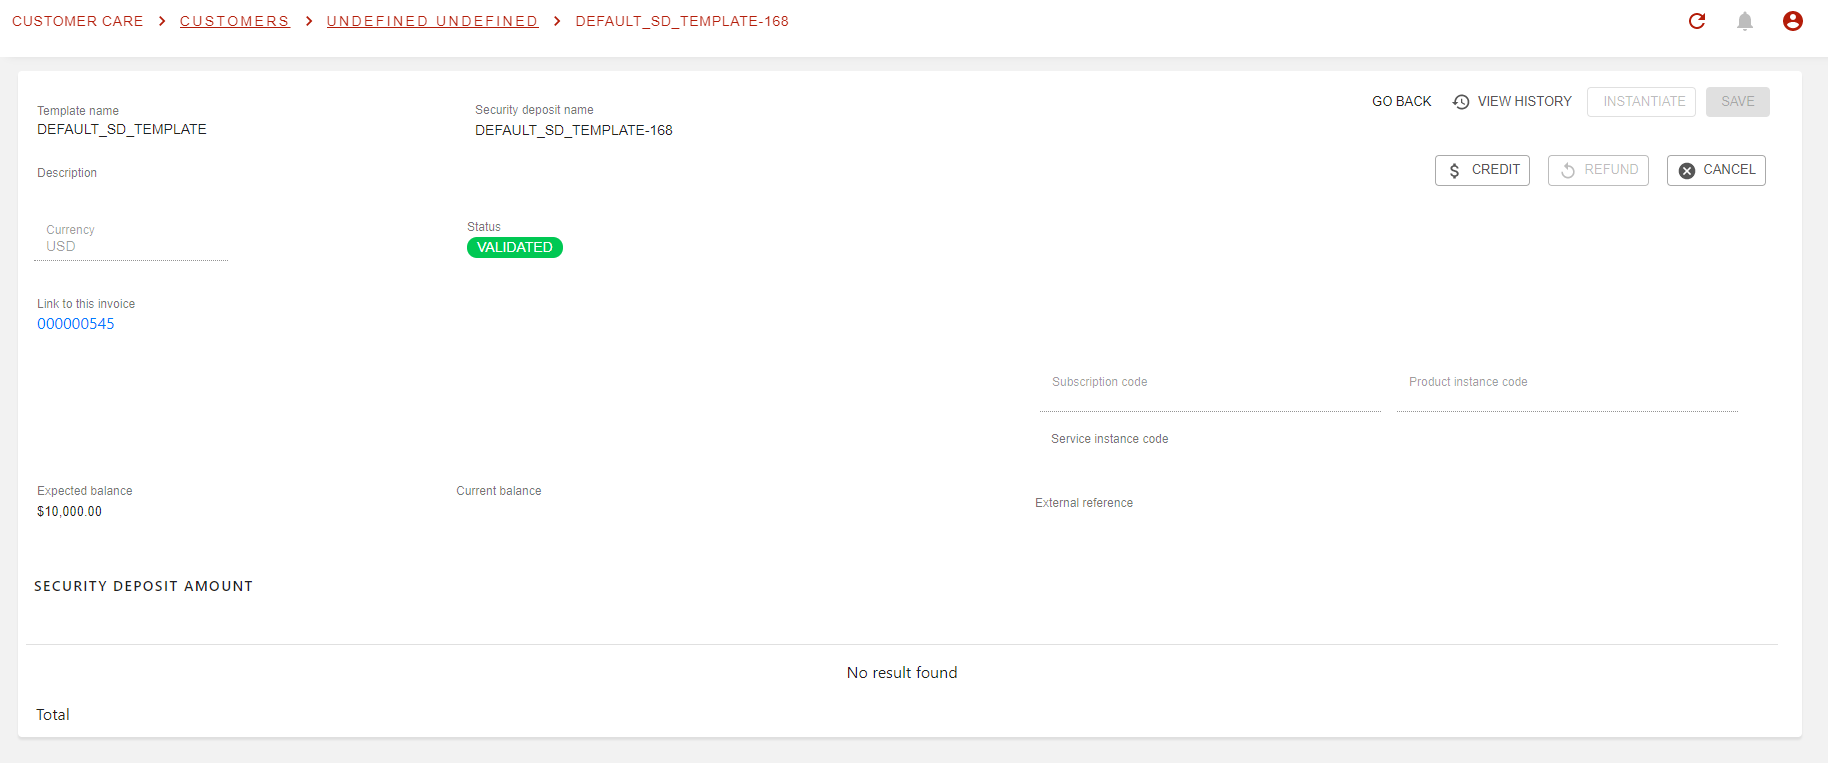
Once validated, the deposit will also automatically create an Invoice, type Security Deposit that will be in VALIDATED status as well (here you can see it via the ‘Link to this invoice field’).
As the deposit has not been made yet, the only amount available is listed under 'Expected amount' field. As soon as a payment will be registered. To do so, two options available:
-
Directly on the Deposit, via the CREDIT button (as below)
-
Via the Manual Matching page and matching the Account operation linked to the invoice itself

When an amount has been registered on the deposit, the it will be updated to LOCKED status, and fields ‘Expected balance' and ‘Current balance’ will be updated as well:
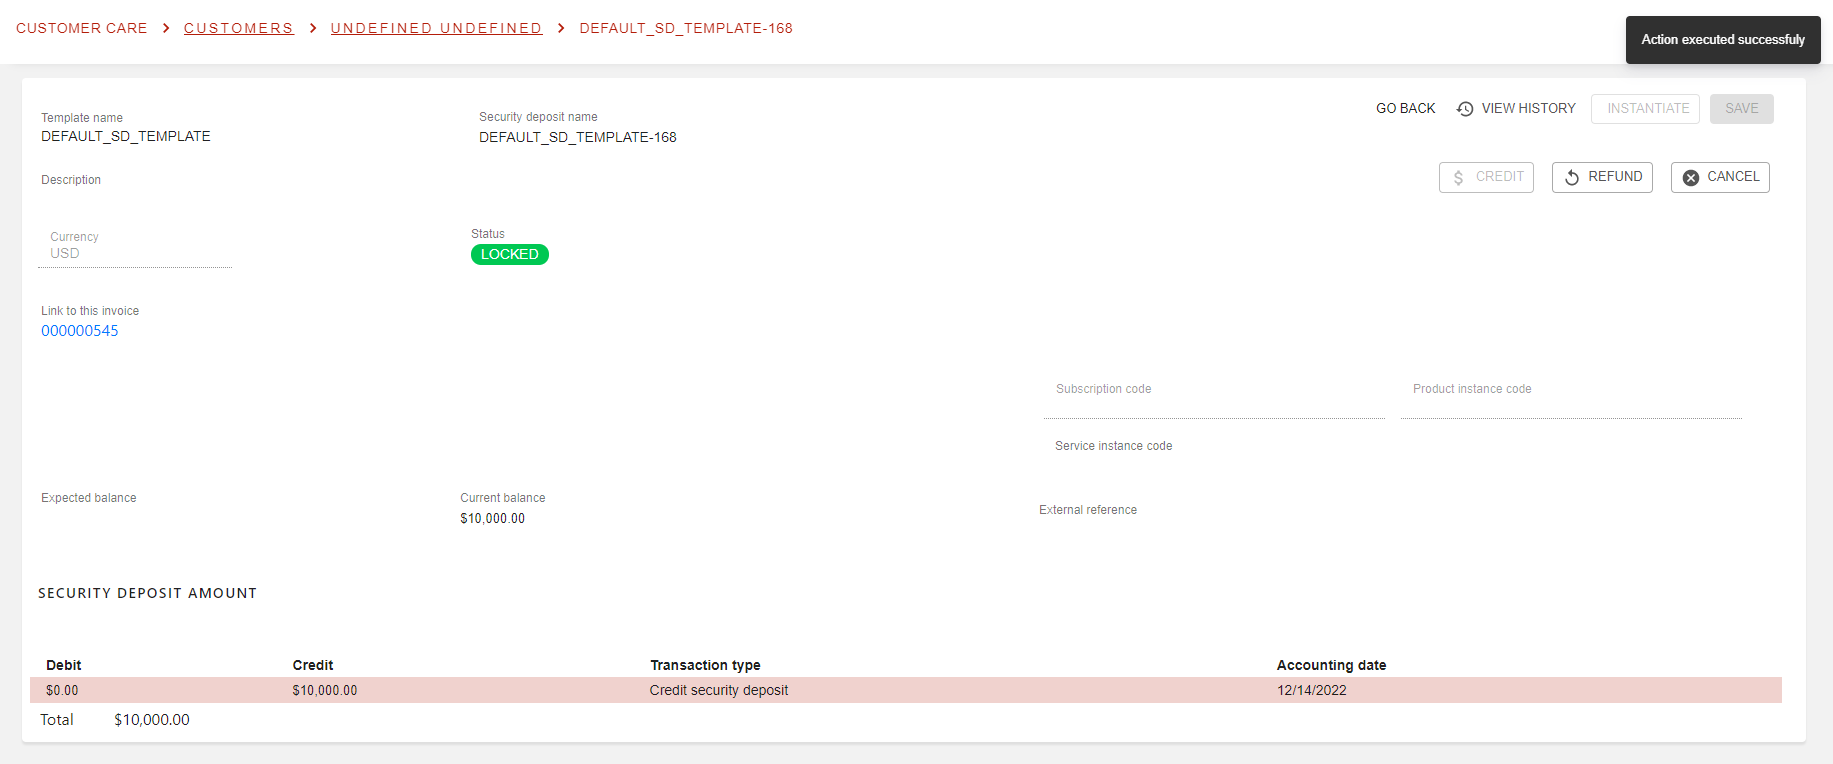
Deposit is both created and credited! 🥳
Refund the deposit
The refund of a deposit is one of two ways to use the actual deposit. This means you will pay back the current balance of the deposit to your customer.
To do so, only press the REFUND button on the deposit page. You will then have to specify the reason for the refund. However, the refund is for the entire amount of the current balance, you will not be able to chose a specific amount.
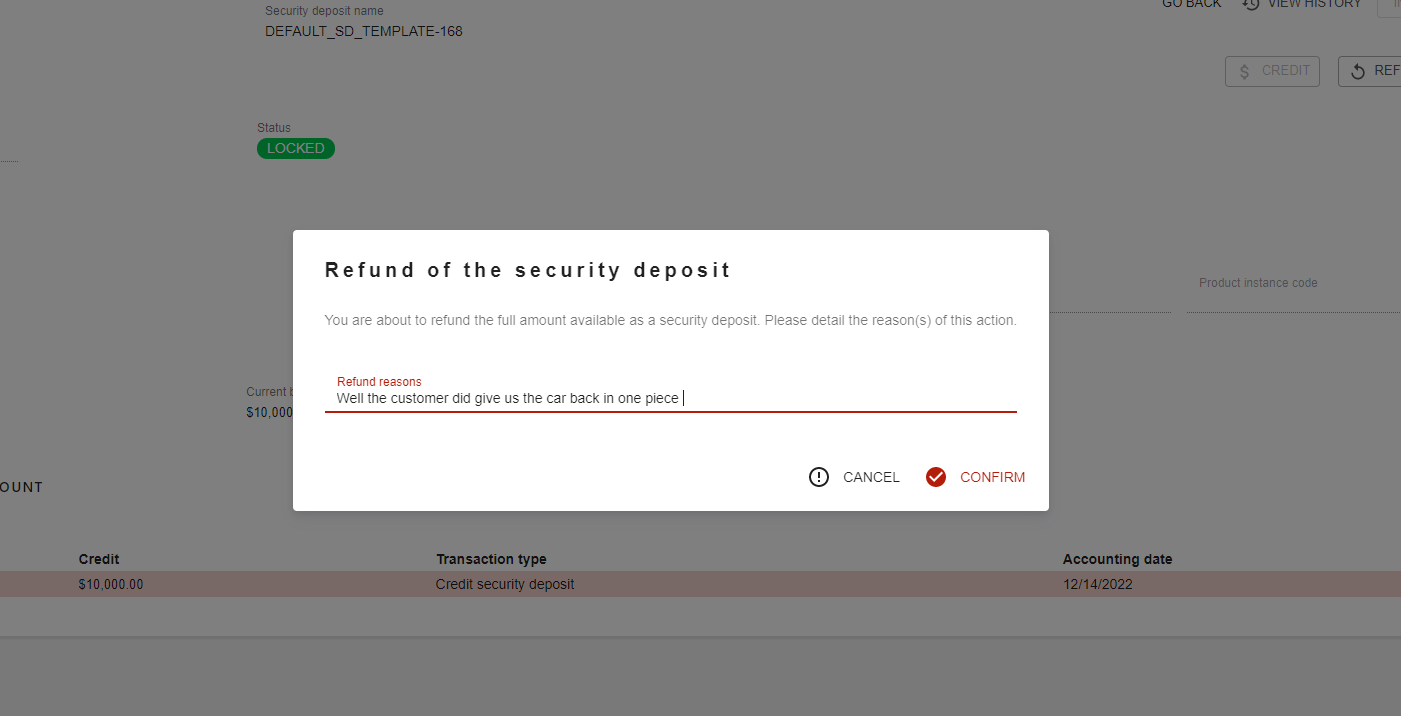
And then just confirm and…
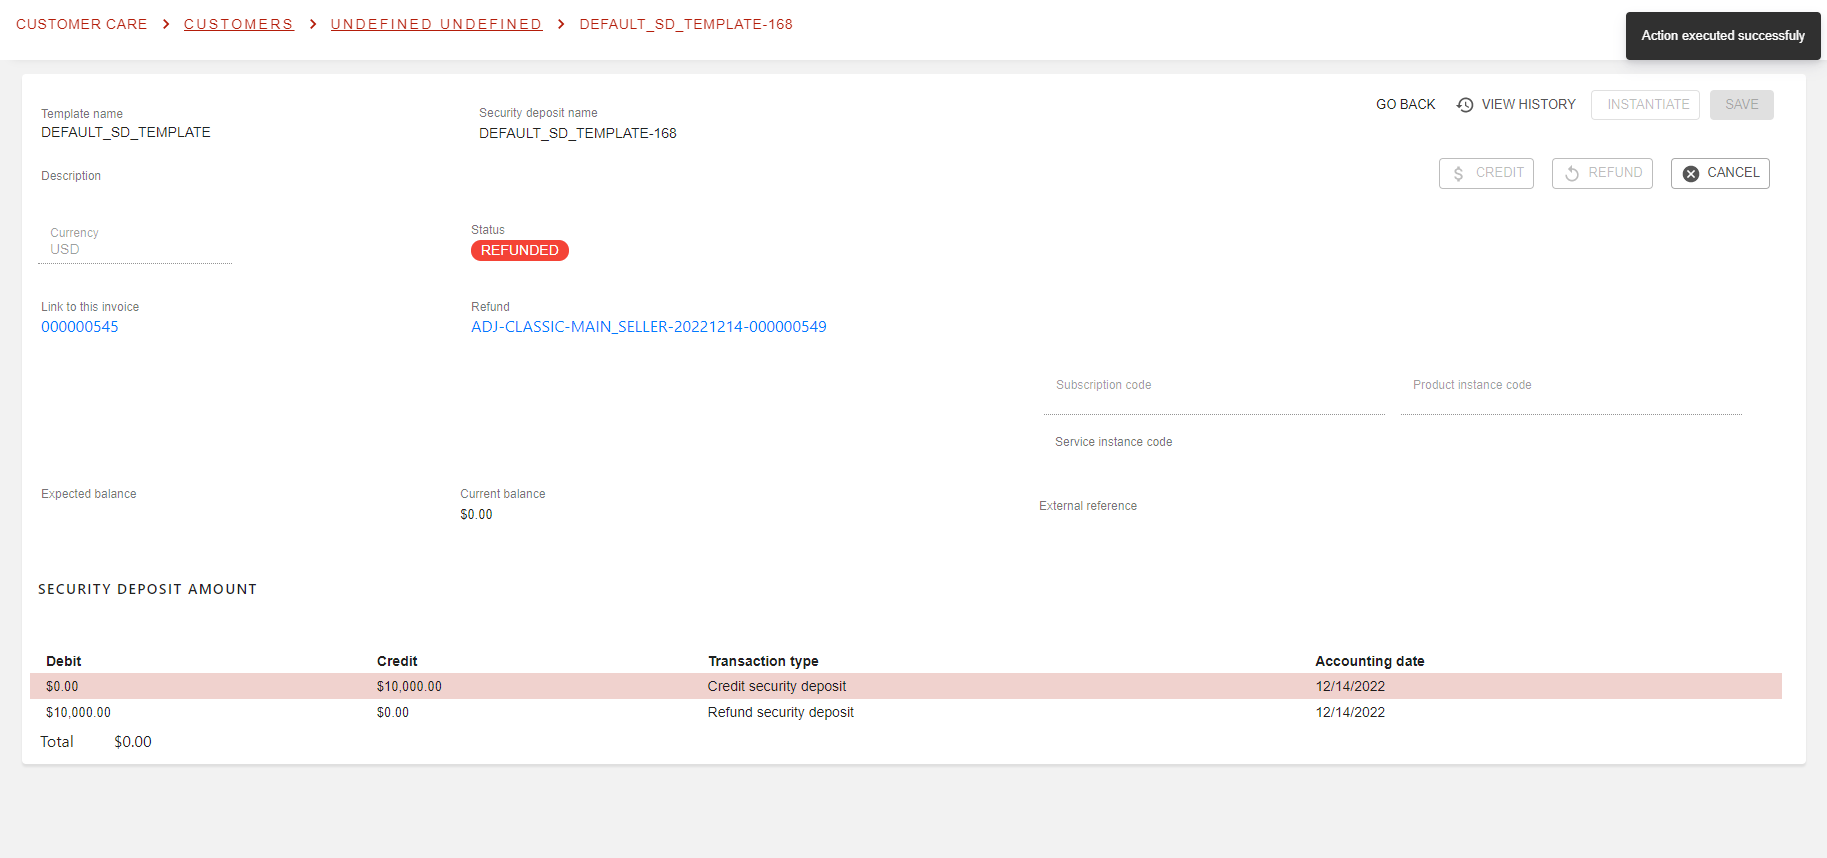
The deposit is now updated to status REFUNDED, and a new line was added to the CREDIT/DEBIT list linked to the deposit itself.
You can chose to refund the remaining balance of a deposit as well. Say you have a deposit for $10K and used most of it to pay other invoices. At the end remains $52.30 on current balance of the deposit. You can then refund this remaining amount to your client 😎
Cancel deposit
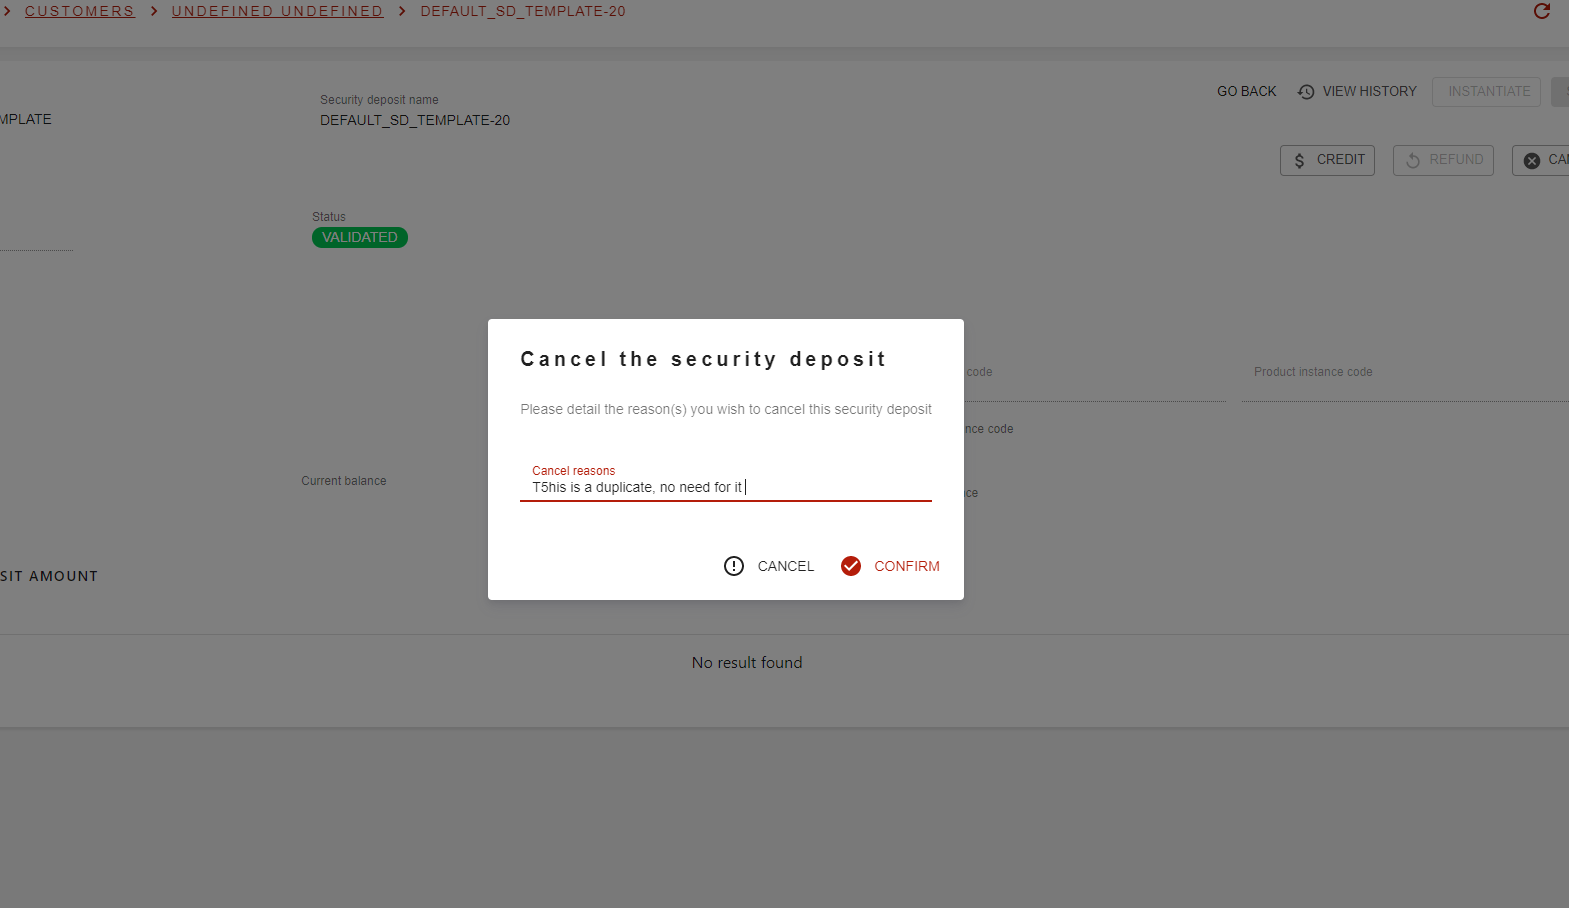
As for all business processes, it can happen that a mistake was done. This is why you can CANCEL a deposit that has been created and that either is in DRAFT of VALIDATED status:
and so:
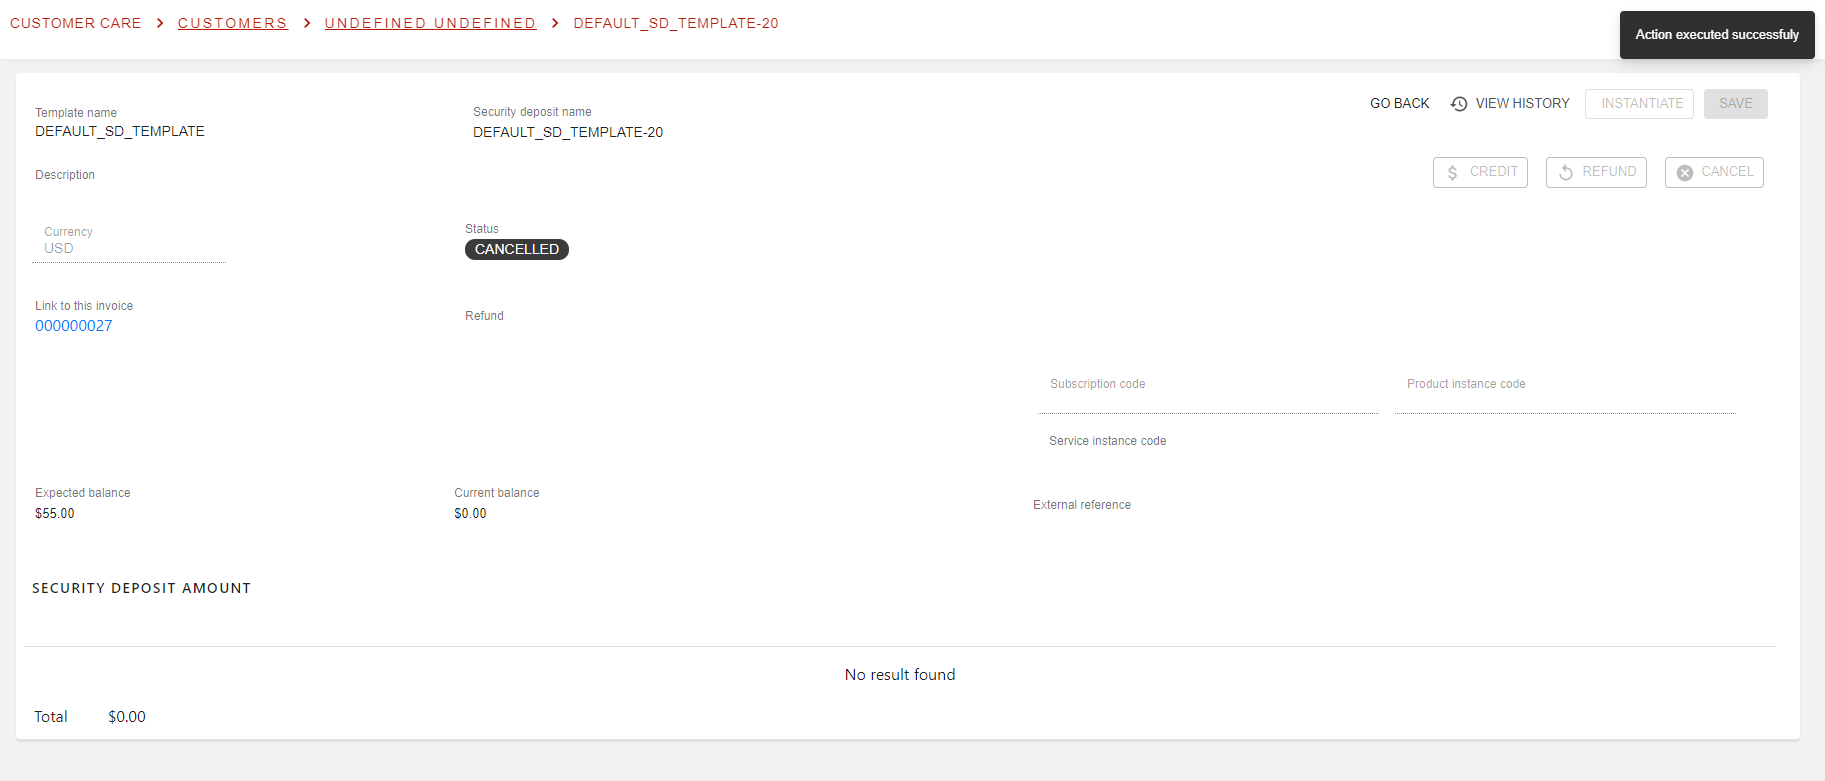
Do not forget to create an adjustment of the linked invoice 😉